Believe it or not, the better part of a year has gone by without an update. Was a busy year without much progress on the modules but some recent show activities have spurred me on to pick up the modeling tools and get back to work.

In the Canyon Module, the major area of focus is now the river bed and waterfalls. To the left is a photo of one of those waterfalls being formed using Woodland Scenics Water Effects modeling compound. Using some spare foam held together with pins to approximate the height of the waterfall on the module, I added a layer of wax paper as the surface on which to spread the compound.
After squeezing lines of the compound directly from the bottle onto the wax paper, I used a metal sculpting tool to shape and add flowing texture to the creamy compound so that it seemed to look like flowing water. Then I allowed it to cure for about 24 hours.
The next day, I removed the waterfall from the form and pealed away the wax paper. I then used some craft glue to apply it in place on the module. Actually the new waterfall still retained most of its opaque whiteness until a few more curing days went by.
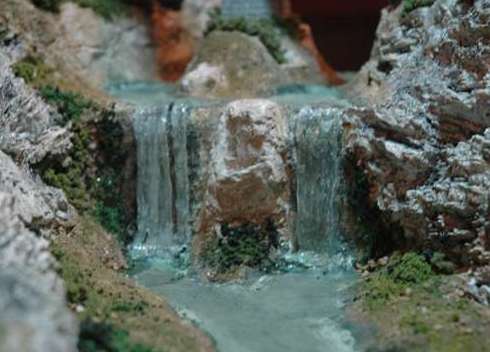
The picture to the right shows the top two waterfalls after the left one has cured for three days, the right one was installed a couple of days earlier. Also visible is some of the river preparation work as a number of layers of color washes have been applied to the surface in advance of adding a water surface layer using the same Magic Water product we used to make my daughter's pond.
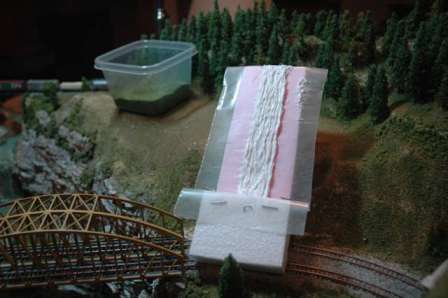
As you can see here, the longer waterfall has just been poured and sculpted over a newly prepared form. I'm working to get this one installed in time for the upcoming GTE Show in Portland. Once it is installed, I will be next looking to add the water surface layer for the section of river between the sets of waterfalls.