
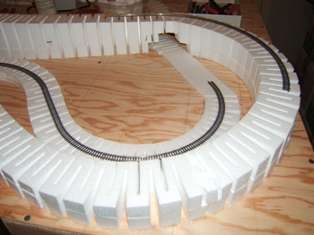
As work continues you can see the north side grade building up. As I did this section I discovered that creating a graceful route was easier to accomplish by using the foam riser's natural tendency to average out bends. Even better, I found that if I glued together a couple of the 24" sections that it was easier to work out the complete run. At key target points on the layout (for example closest points to the edge or positions of switches), I would temporarily pin down the foam and let the rest of the foam find its natural position based on the flex characteristics of the foam (note the zig-zag pattern in the foam as this tends to make it act like a spring). The more you stress the foam to make a tighter curve, the more circular the shape that forms, the less stress the straighter it gets and transitions between the two tend to form graduated spirals. This latter effect helps to establish reasonable easements into and out of curved sections of track.
Continuing further, you can see that the lower industry track has finally crossed under the rising north side grade. Based on the layout plan, this industry track will disappear behind the industry structure only to reappear from behind the matched industry on the Southside of the layout. The rather crude foam cutout under the Northside grade will be modified as needed to allow for clear passage of the trains that will take this industry route as part of an loads out/empties in operational scenario. All of this will be covered over by the mountain onto which the Northside grade ascends.
BTW, the foam is being attached to the board using a hot glue that is a low enough temperature as to not damage the foam. I'm using the Woodland Scenics product for this but a number of other glue guns and sticks will also do the trick. Some of the higher sections in this picture are not glued down just yet and pins are used to hold them temporarily in place. I won't glue on the section above the industry route until after the lower track is fully installed.