Couldn't wait to start framing up the module ... this photo showing the underside structure. The framing is a bit light at the moment and I'll hold off adding any more structure until a bit later after determining where the weaker points are after adding the side paneling.
Once again, I'm using hemlock for the framing and I've taken special care to select each piece by lightest weight as I found that there was quite a difference between the boards in stock at my local lumber yard.
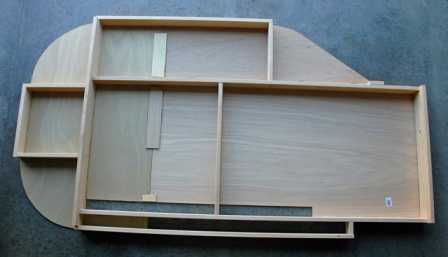
Its not easy to get the scale of size from this photo ... referring back to the plan above, you will note that the module is 6 feet long and it required cutting up three 2' x 4' panels of 1/4" thick material to make the surface, the better side of those panels exposed to the underside since this will be exposed when the module is complete

This view from the top ... you'll probably note a couple of uncovered sections (those narrow areas near at the bottom edge of this view. One of these will be filled shortly to provide the path for the outer mainline, the other is actually where the yard power and turnout controls will be framed in as part of a control panel.
You'll note that there is no pink foam. This particular module is essentially flat so I felt no need to add the thickness of foam into the design. I'm not absolutely sure that I won't want to have a feature or two get below the module surface and if so, I'll simply cut that section out and add appropriate sub-structure to make it work ... for the moment, I don't think that I'll have anything like that to do.
.